 I’d like to share my recent experiences from performing live with surround sound. The system dealt with is the diamond shaped surround field of eight full-range speakers. I will go into planning, preparation and stage setup strategies. The general approach is to create the most exciting live performance experience for the audience.[……]
Lovely Harp Guitar!
Just a quick video upload testing out my new Tim Donahue signature Electric Fretless Harp Guitar. I think it plays like a dream… in fact I have been dreaming for decades about certain aspects of what this instrument has to offer. Tim designed it and has been playing this and the fretted version since the eighties and just recently initiating manufacturing of his harp guitars. You’ll find more on that at http://www.timdonahue.com/
[……]
I love my Stick!
After having my new instrument, the Chapman Stick, for five months I finally decided to shot a video of it. What makes the Stick so fun to play is tha[……]
The Chapman Stick totally rocks!!!
 I’m learning a new music instrument here, The Chapman Stick. It’s so fun because on the stick you can play both bass, comping chords and melody lines[……]
Logic seminars Gothenburg-Stockholm-Malmö
Logic Studio is a complete set of professional applications that lets you write, record, edit, mix, and perform music. Apple and IDG is offering workshops with some of Sweden’s best music engineers and producers. [……]
“First Meeting” trio concert downloads

One night in Mars 2009 I met up with these two guys to play a completely improvised concert together. They had been playing together before, but not[……]
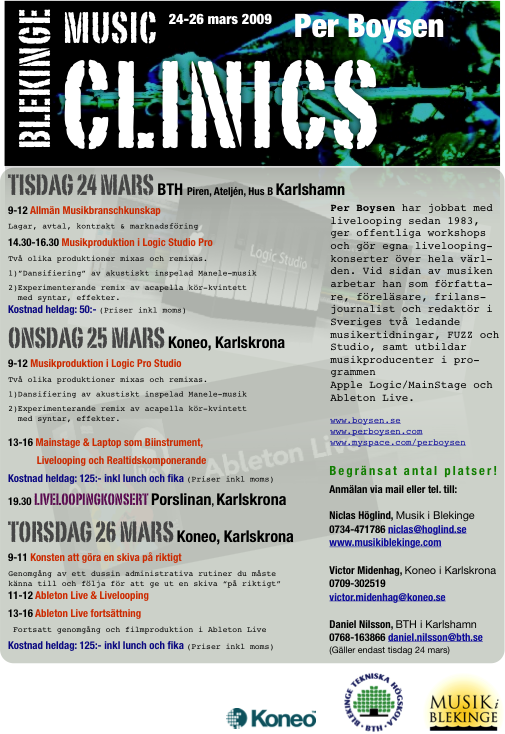
Blekinge Music Clinics Mars 24-26 with Per Boysen
Clinics hold in Swedish – concerts in Bb. Pre booking, please see poster below:
 [……]
[……]
How to use chord progression in live looping
When you loop live it can be quite a challenge to make use of such a basic musical component as a simple chord progression. This may have to do with t[……]